 |
|
|
Networking > Apartments >
Buffalo AirStation Setup
Buffalo AirStation WHR-G125
- After unpacking your Buffalo wireless router, connect the ethernet cable from your jack to the rightmost ethernet port on the back of the router. This is the blue WAN port labeled "Internet". Next, use another ethernet cable to connect your computer to the router, using any of the 4 remaining open ethernet ports on the back. Finally, plug the AC adapter into the power port on the router and plug it into the wall.
- Once the router has been plugged into the network and powered on, the power light will come on and the other status lights on the front will go through a series of flashes. Once the leftmost diagnostic light labeled "Diag" has gone off and the light labeled "Router" has come on, this means your router has been initialized and is connected to the network.
- Now open a web browser window and enter 192.168.11.1 in the URL field and press enter. You will get a prompt to enter a username and password to access your router settings. You should enter "root" (without quotes) as the username and leave the password field blank, then click OK. You are now taken to a page where you can configure your Buffalo wireless router.
- Click on the Admin Config button on the top right of this page. Enter a name for your AirStation and click Apply. Wait for the router to restart with the new setting, you may have to refresh your browser window.

-
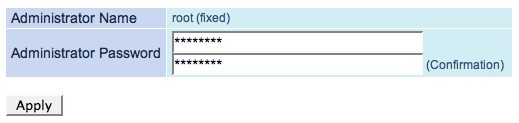
- Next click on the Password button in the small row of choices under Admin Config. The Administrator name is fixed as "root" however, you should now choose an Administrator Password (8 characters or less) and enter it in the two fields provided, then click Apply. Wait for the router to restart, and you will be prompted to login with the username "root" and the new password you just set up. If you choose a password over 8 characters long, you will be unable to login and will have to reset your wireless router by using the pinhole on the bottom.
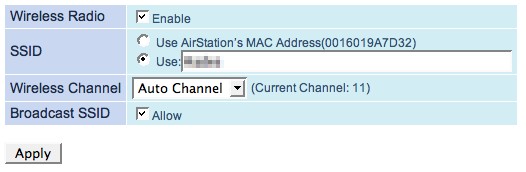
- Next click on the Wireless Config button on the top, third from left. In the small row of choices under Wireless Config, click Basic(11g). Make sure the box labeled Enable next to the Wireless Radio setting is checked. For the SSID setting, switch to the second choice Use: and then choose a name for your wireless network. You should write this name down and keep it near your wireless router in case you forget it. Click Apply.
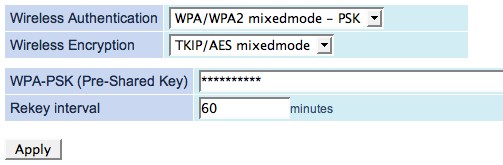
- Next click on the Security(11g) choice under Wireless Config along the top of the page. For the Wireless Authentication setting, select WPA/WPA2 mixedmode - PSK. For the WPA-PSK (Pre-Shared Key) field, choose a password that is between 8 and 63 characters (letters and numbers only) and enter it here. Click Apply.
- Your Buffalo wireless router will restart and is now configured to connect securely to the Internet.
|
|
|
 |
