 |
|
|
Networking > Apartments >
Netgear WNDR3300 Setup
Netgear WNDR3300 Dual Band Wireless Router
- Please consult your manufacturers manual for advanced setups and
further information about your product. The first few steps in this
guide should coincide with the information found in the manual, however
we will follow up with important information on how to secure your
wireless access point.
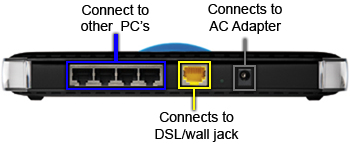
- Plug the power adapter for the router to an eletcrical outlet and
an ethernet cord from your computer to one of the ports on the router
marked 1-4 (any of the ports except for the yellow painted
port). Connect an ethernet cord from your jack in the wall to the
yellow painted port on the back of the router. Next open a web browser
window on the connected computer and type http://192.168.1.1
into the address bar and press enter.
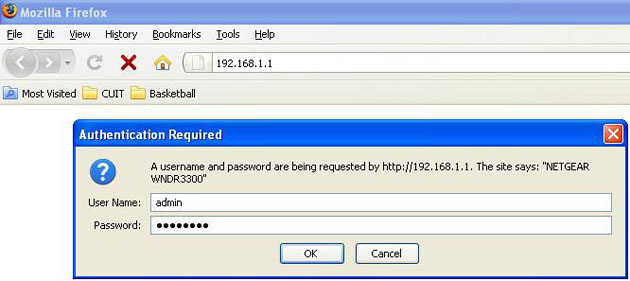
- You will be prompter for a username and password; use the default
settings, entering admin as the username and password as the
password. You may be prompted to use the Smart Wizard Setup which is not
necessary. You may also receive a message telling you the router is
searching to update the firmware which you can allow for to have the most
up-to-date router settings. After any updates you will be taken to the
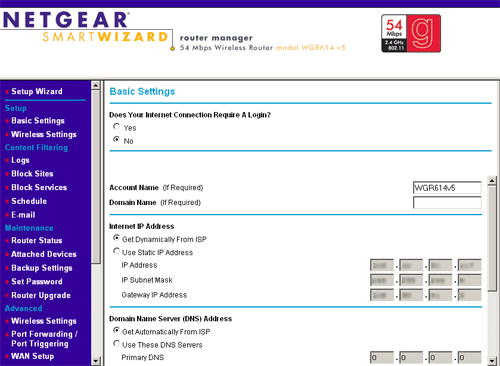
Basic Settings page where no changes will need to be made from the default
settings.
- Next configure your wireless settings by clicking on the tab on the
side labeled "Wireless Settings".
- Once in the Wireless Settings Page, you can choose a name for the
wireless network you are setting up. Because this is a dual-band router,
the router will broadcast two wireless networks simultaneously--one in
the 5hz range for wireless-N devices and one in the 2.4hz range for
wireless-B/G devices. You are required to create
a Wireless Network Name (SSID) for both the N and B/G networks.
These names should be different from one another so that you can identify
them for your devices with the different wireless standards of B/G or N.
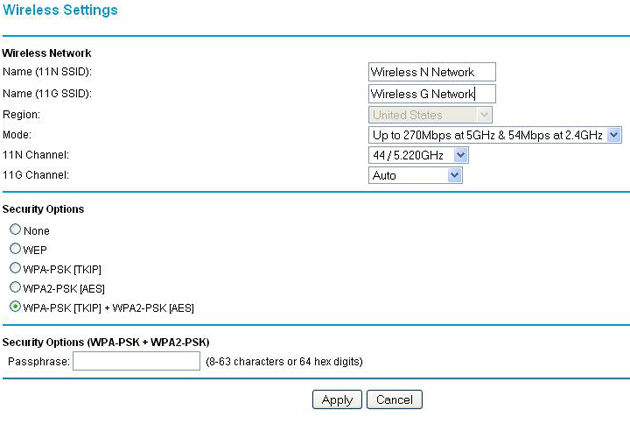
- Once you have chosen the names scroll down to the security options
selecting the WPA-PSK + WPA2-PSK option. Then type a password
into the Passphrase box--record this password for your personal
records as you or any guests of yours will need this password to connect
to your wireless network.
- Next click Apply to save your new settings.
You can now connect securely to your wireless network through your computer's
wireless software using the Wireless Network Name and password just setup.
|
|
|
 |
