Matrix Band Placement
(see also Sturdevant, 4th ed., pg. 718-726)
Back to Class II Amalgam Restoration | Back to Operative Videos
The Universal (Tofflemire) matrix system is used in Class II restorations.
The primary function of the matrix is to restore anatomic proximal contours
and contact areas. A properly placed matrix should:
- Be rigid against the existing tooth structure
- Establish proper anatomic contour
- Restore correct proximal contact relation
- Prevent gingival overhang
- Be able to be easily removed
Armamentarium
Tofflemire Matrix Retainer
Matrix bands
(narrow or wide; usage depends on depth of gingival cavosurface margin)
Wedges
Cotton Pliers
Scissors
Knife
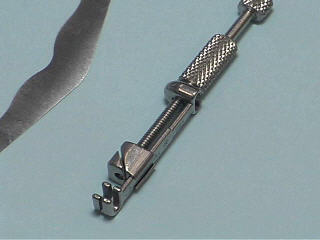
The matrix retainer has four parts:
1. Head – U-shaped, has three guides, or slots, for the position of the band
2. Locking vise - sliding body that holds the band
3. Long knob – changes the diameter of the loop
4. Short knob – locks the band in place within the sliding body |
Matrix Retainer Video Demo
Right-click here to download this video.
( Choose the "Save As ..." option from the menu.) |
Back to top | Back to Class II Amalgam Restoration | Back to Operative Videos
Procedure
- Try the wedge.
- Burnish the matrix band.
- Place the matrix band into the retainer.
- Fit the matrix onto the tooth.
- Place the wedge.
- Tighten the matrix band around the tooth.
Try the wedge.
Click on image to view video demonstration.
Right-click here to download this video.
( Choose the "Save As ..." option from the menu.)
Use of a wedge with the matrix band serves two purposes:
- Helps to compress the matrix band against the tooth structure to create
a tighter seal, preventing gingival overhang.
- Provides slight separation between the teeth, compensating for the thickness
of the matrix band, and thus helping to create a tight contact between the
finished restoration and the adjacent tooth (otherwise, when matrix band is
removed, a space equaling the thickness of the matrix band would exist between
the restored proximal surface and the adjacent tooth).
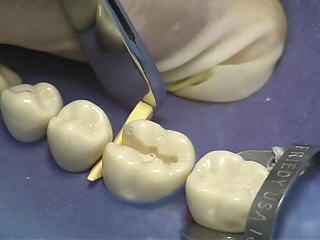
Prior to placing the matrix band, place a wedge in the gingival embrasure to
check the relationship between the occlusal surface of the wedge and the gingival
cavosurface margin. In order for a wedge to be effective during amalgam placement,
it should fit tightly against the tooth and its occlusal surface should extend
above the gingival cavosurface margin, creating a tight seal.
To place the wedge, stretch the rubber dam tightly to allow it to seat more
gingivally and keep it from getting caught by the wedge. After placing the wedge,
use the blunt end of the cotton pliers to push it into place.
If the wedge fits tightly against only a portion of the gingival proximal surface,
fit a slightly larger wedge and use a knife to contour the side of the wedge
facing the proximal surface, so that it fits snugly around the entire gingival
proximal surface. For example, this contouring of the wedge is often required
when restoring the mesial surface of the maxillary first premolar, due to the
mesial concavity that exists in its cervical portion.
If the wedge fits tightly against the tooth but it’s occlusal surface
is too high above the gingival cavosurface margin, a knife can again be used
the trim the occlusal surface of the wedge so that it extends just above the
gingival cavosurface margin.
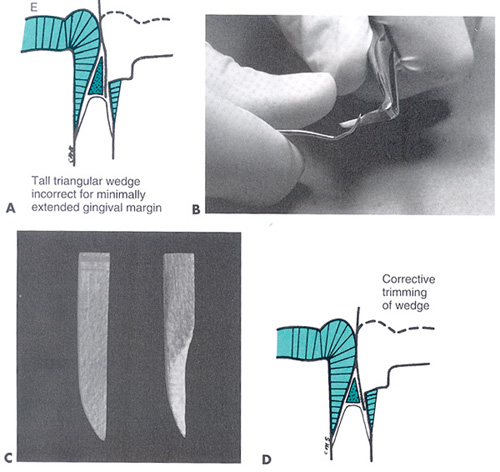
| Fig. 17-85:
Modified triangular (i.e., anatomic) wedge. A, Depending
on proximal convexity, triangular wedge may distort matrix contour. B,
A sharp-bladed instrument may be used to modify the triangular steepness
of the wedge. C, Modified and unmodified wedges compared.
D, Properly modified triangular wedge prevents distortion
of matrix contour. |
 |
Back to top | Back to Class II Amalgam Restoration | Back to Operative Videos
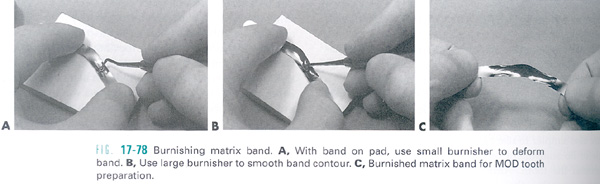
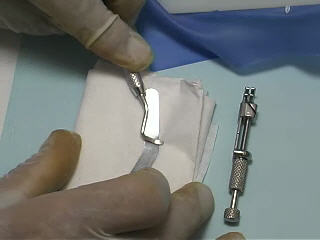
Burnish the matrix band.
The flat matrix band must be burnished, or shaped, to achieve a contour facilitating
its proper adaptation to the tooth structure. Begin by folding a paper towel
several times and placing it on the benchtop; this provides a more cushioned
surface for burnishing. Hold the matrix band in place on the paper towel and
use a burnisher or the blunt end of an instrument, such as an examination mirror,
to rub against matrix band back and forth. This will introduce a curvature into
the matrix band.
Click on image to view video demonstration.
Right-click here to download this video.
( Choose the "Save As ..." option from the menu.)
Back to top | Back to Class II Amalgam Restoration | Back to Operative Videos
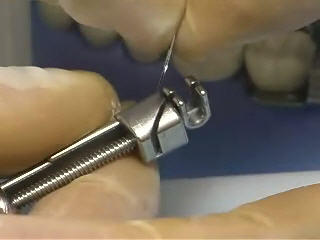
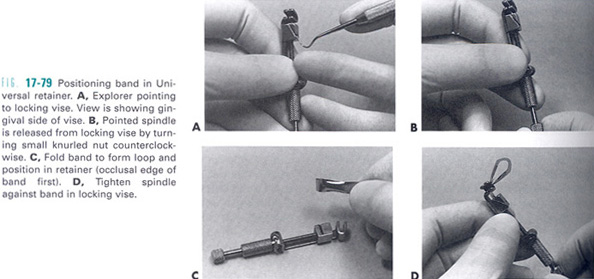
Place the matrix band into the retainer.
Click on image to view video demonstration.
Right-click here to download this video.
( Choose the "Save As ..." option from the menu.)
To prepare the retainer to receive the band, turn the long knob to move the
locking vise all the way down to the head of the retainer. Then turn the short
knob to loosen the retaining screw (the retaining screw should disengage from
the sliding body).
Fold the band to form a loop; notice that when the band is folded, one edge
has a smaller circumference than the other; this design accomodates the difference
in tooth circumferences at the contact and gingival levels. There are two main
rules for correct placement of the matrix system on the tooth:
- Open end of the retainer head is ALWAYS placed toward the gingiva.
- Smaller circumference of the band is always placed toward the gingiva.
Based on the two rules above, the following is also true:
- The occlusal edge of the matrix band must be placed in the retainer with
the occlusal edge facing the retainer.
- In the LRQ & ULQ, the screw side of retainer is faces the buccal surface
of the tooth; in the URQ & LLQ, the flat side of the retainer faces the
buccal surface of the tooth.
These rules serve as a guide to how the matrix band must be positioned in the
retainer. With the rules in mind, place the two ends of the band in the slot
of the locking vise (occlusal edge of the band facing the retainer) and position
the band in the correct slot of the head, such that the rules above will be
satisfied. Turn the small knob clockwise, lowering the screw into the vise and
thus locking the matrix band within the retainer.
Back to top | Back to Class II Amalgam Restoration | Back to Operative Videos
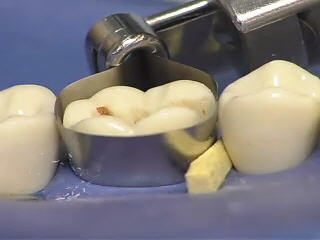
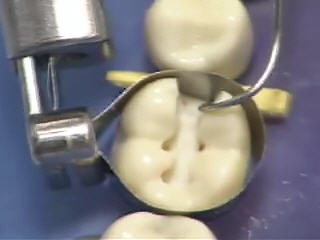
Fit the matrix onto the tooth.
The band should be seated around the tooth such that:
1. The occlusal portion of the band extends 1.5 – 2.0 mm above the marginal
ridge of the adjacent tooth and the cavosurface margin–this allows for
proper condensation of the amalgam in the marginal ridge area.
2. The gingival portion of the band extends 0.5 mm below the gingival CSM.
Click on image to view video demonstration.
Right-click here to download this video.
( Choose the "Save As ..." option from the menu.)
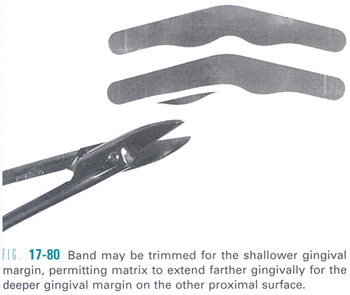
| In certain situations, it may be difficult to achieve the proper fit in
the gingival area, such as when a gingivally located carious lesion necessitates
gingival overextension of the cavosurface margin. In such situations, while
the band may fit correctly on the affected side, proper fit around the unaffected
proximal surface (eg., in a DO prep, the mesial tooth surface may by impeded
by the interdental papilla. To facilitate proper fitting of the matrix,
it may be necessary to trim the matrix band at the unaffected proximal surface.
Be sure to always trim the gingival, rather than the occlusal portion of
the matrix band. |
 |
Back to top | Back to Class II Amalgam Restoration | Back to Operative Videos
Tighten the matrix band around the tooth.
To tighten the matrix band around the tooth, turn the long knob; this will
pull the matrix band up along with the sliding body, thus decreasing the diameter
of the matrix band and tightening it around the tooth. Tighten the matrix as
much as possible around the tooth; this allows for proper amalgam condensation
and contour development.
To check that the explorer is tightly adapted to the gingival surface, use
an explorer and try as hard as possible to place the tip between the matrix
band and the gingival cavosurface margin; you should not be able to do so. This
also helps to remove any unsupported enamel left in the area.
Click on image to view video demonstration.
Right-click here to download this video.
( Choose the "Save As ..." option from the menu.)
Place the wedge, once it is seated tightly in the gingival embrasure, loosen
the matrix band slightly by turning the knob 1/4 of a turn. This
prevents the matrix band from being too tight, which may lead to an open contact
and may hinder proper condensation of the amalgam into the proximal cavosurface
margin areas
Finally, use a spoon excavator or burnisher to burnish the matrix band to the
adjacent proximal contact area.
Back to top | Back to Class II Amalgam Restoration | Back to Operative Videos