
Academic Information
Systems
![]()

MacOS 8/9 Network Printing
In order to print to an AcIS printer from your residence hall room, you will need to have Windows configured to use DHCP.
Adding a Printer
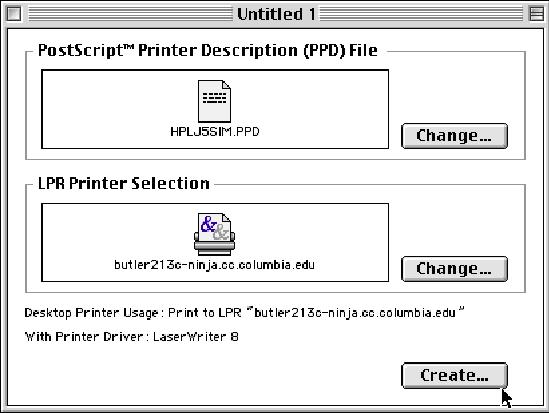
- Run the Desktop Printer Utility program. On MacOS 9.1 and higher, this application is located in the Applications (Mac OS 9) > Utilities folder. On MacOS 9.0 and lower, this application is in the Apple Extras > Apple LaserWriter Software folder.
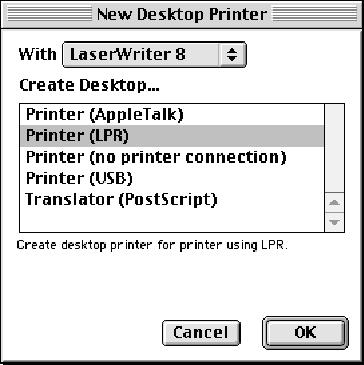
- Select Printer (LPR) and click OK.
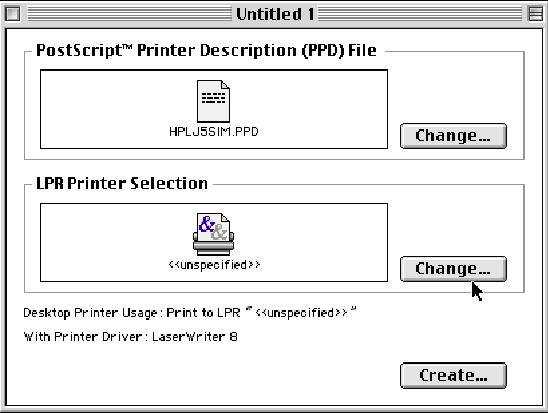
- Under PostScript Printer Description (PPD) File, click Change... to select the printer driver. Additional HP drivers are located here
.
- Under LPR Printer Selection, click Change....
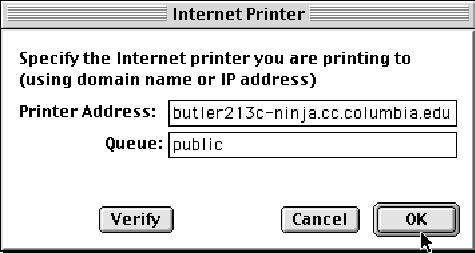
- Enter the LPR Server for the Printer Address. A list of the lpr servers can be found here. Enter public for the Queue. Click OK.
- Click Create
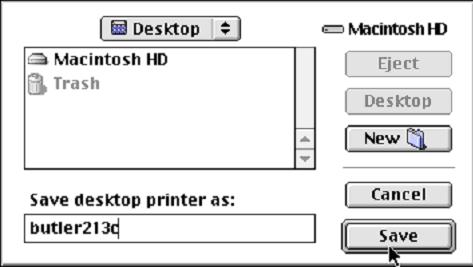
- Enter a printer name that you would like to use and click Save.
Printing Your File
Once you have configured a printer you must still choose it as your file's destination when printing. Any files you print will be sent to the printer you choose under an application's Print Setup, which is normally found under the File drop down menu.here for more information about NINJa printing.
- Open the file that you plan to print.
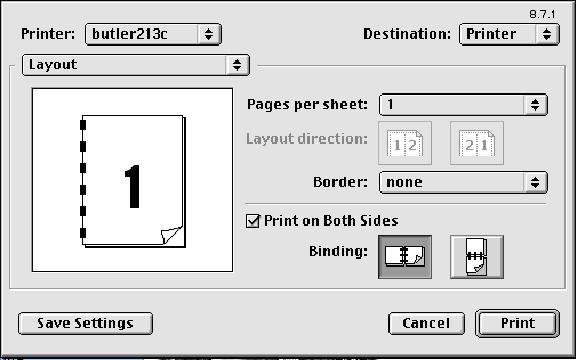
- Select Print... from the File menu.
- You may select additional options such as double-sided printing by selecting the Layout drop-down menu.
- Once the print dialog box disappears, you may go to the NINJa printer station and pick up your document. Click
If You Also Have a Local Printer...
If you also have a local printer connected to your PC, you may switch between the local printer and the NINJa printer at any time simply by changing the printer setting under the application's Print Setup dialog usually found under the File drop down menu.
RHNO Home | RHNO Printing | Mobile Network Service
Academic Information Systems
[email protected] - 22 July 2002 - 212 854.1919