Home
Introduction The SIS Desktop Reports is an application which allows Columbia administrators to run reports on SIS data from their own desktops. These reports include class rosters, lists of majors and concentrators, address labels for various populations, and more. The application is downloaded from the web, and no purchase of software is required. Read below for requirements, instructions on the download and installation process, and information on running the reports. Requirements Hardware: IBM-compatible 486 or higher.
Software: Windows 95, Windows 98, Windows NT, Windows 2000 or Windows ME.
Reporting ID: In order to retrieve data from your reports, you
must have a Report Server ID. To obtain this ID, please submit a
Report Server ID Request Form. Installation
Once you have
downloaded and installed SIS Desktop Reporting, reports
are ready to run. In your c:\sis directory will be one system folder (called ws_ftp)
and 6 report folders: accounts, admissions, financial aid, housing,
miscellaneous and student records. Each report folder contains a Word document
explaining the function of each report in the folder. Within each report folder, reports
are categorized by report group. The following is a description of the report groups
within each report folder:
In the accounts folder:
To run an SIS Desktop Reporting report, simply double-click on the .exe
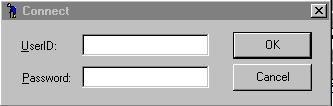
file's icon. The following box should appear:
In the UserID field enter your Report Server ID. Then tab down
to the Password field and enter your password. It will not appear
as you typed it. Then click on the "OK" box. You should then
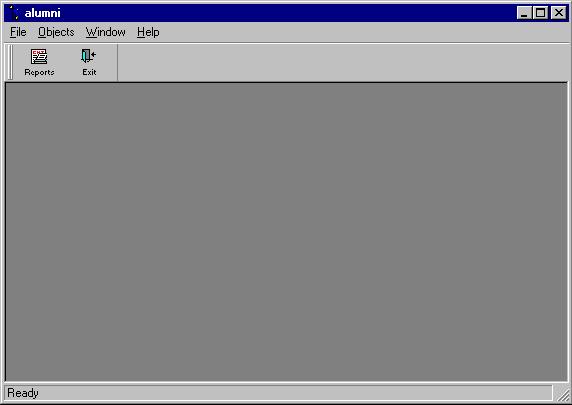
see a screen similar to the following one, from the alumni.exe:
Click on the "Reports button. A box similar to that below will
be displayed, and you will see a list of programs available in that directory:
Please note, also, that there is also a brief description of the report
to the right of its name. You may need to use the scroll bar a the
bottom to see all of the contents of the description. Select the
report you want to run. Double-click on the report name. At
this point you will be asked for "retrieval arguments" in a run time parameter
box that will look like the following:
Formats for the argument values are in the Word documents that accompany
each directory. Enter your selection criteria, and then click "OK".
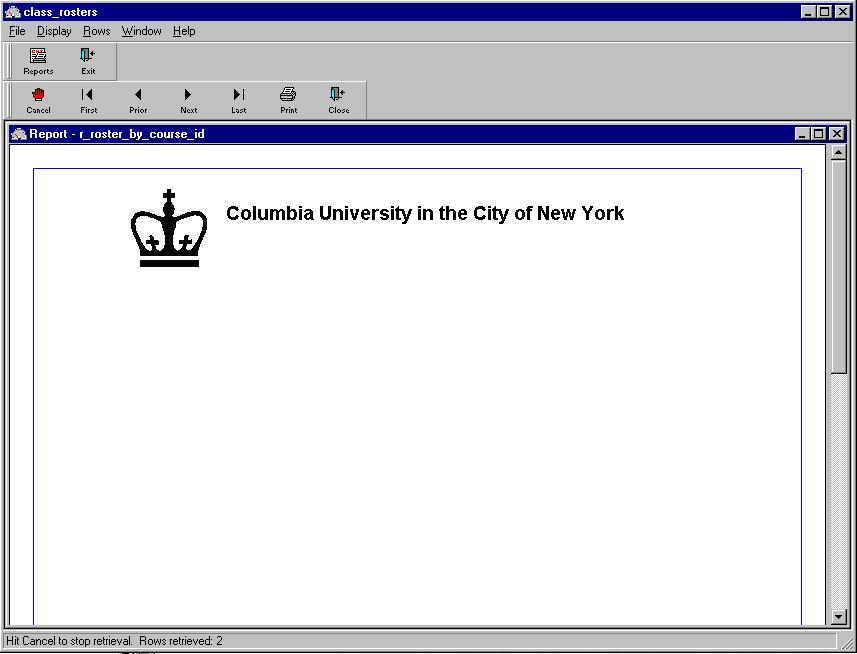
The main program box will then look like the following:
You will notice that at the top left corner there is now a box with
a little red hand and the word "Cancel" in it.
This is the button to press to cancel the report request. You
would use this button if you started to run a report and then realized
you made a mistake in entering one of the retrieval arguments. You
will also notice that on the lower left hand corner there is an informational
message that will tell you how many rows of information the report has
returned to your PC during and at the conclusion of retrieval process.
It is a good idea to keep an eye on this number. If the report
is retrieving many more rows than expected you can cancel it by hitting
the "Cancel" button, and then checking your retrieval arguments.
When the report is finished running the button with a red hand and the
word "Cancel" will change to a "Retrieve" button.
You can now print, save the report, or rerun with different retrieval
arguments. To print the report just hit the print button
and follow the print dialog box. If you wish to save the data,
you have a choice of more than one format to save the file in. To
do this you need to click on the file item at the top. When you do
you will get a sub-menu of items to select from. Select the "Save
Rows as ..." Item. A new box opens up.
You will first need to select in what format you want to save the data.
After you have selected the format you can then enter a file name.
Then click the save button and your file saved. When you are done
you can exit the program by clicking on the "Exit: button.
If you have any questions about running any of these reports that are
not answered by this document, please send email to [email protected].
|